Table of Contents
2.1.9 Qty, Unit price, VAT rate, VAT Value, Gross
2.1.12 Bank account to display
2.2 Save, Save draft & Refresh Invoice
3. Additional Invoice Features
3.1.1 Adding a discount percent to the full invoice
3.1.2 Adding a discount to a line item on the invoice
3.7 Additional Payment Methods
3.8 Show both a delivery address and an invoice address on an invoice
1. Introduction
This guide demonstrates how to create a basic sales invoice. The fields and elements on the invoice create form are then explained in more detail.
Additional invoice features can be enabled from the Settings > Configure system > Toggle features menu which add more fields and options to the invoice create form.
2. Create a quick invoice
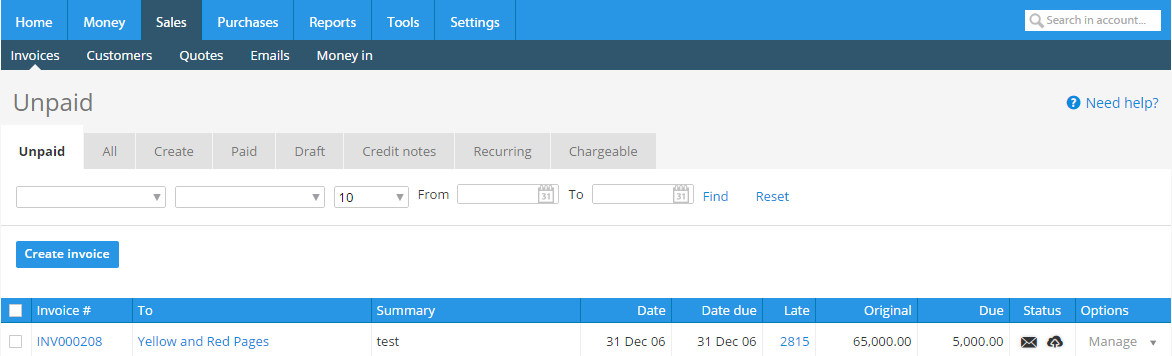
Navigate Sales > Invoices and click on the 'Create Invoice' button.

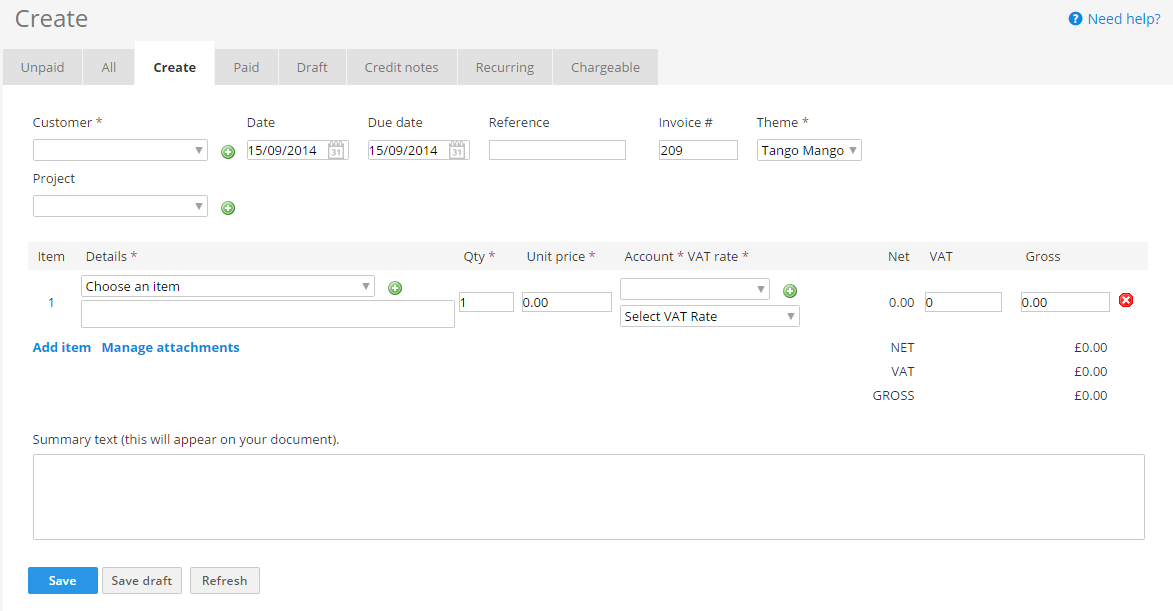
Below is an image of the invoice create form, to quickly create an invoice just fill in all the fields with an asterisk (Customer, Date, Theme, Description, Account code, Qty, Unit price, VAT, Gross) and hit the 'Save' button, as shown below:

2.1 Invoice Fields & Elements
Each of the fields and elements on the invoice create form are now described in more detail below.
2.1.1 Invoice #
The invoice number field will increment in chronological order each time you create a new invoice. You can enter your own invoice number if required, however, the system will always try to plug any gaps.
You can set the first invoice number to increment from on the Settings > Configure system > Invoice preferences menu.
2.1.2 Customer
Use the 'Add' link below the customer field to quickly add new customers via a pop up box.
You can view and add customers on the Contacts > Customers menu. You can also import customers in bulk from a CSV file on the Tools > Import menu.
2.1.3 Date
The invoice date determines when the invoice will appear on reports such as the P&L and Balance sheet.
2.1.4 Due Date
The due date is determined by the default credit terms set on the Settings > Configure system > Invoice preferences menu. You can also add credit terms for a specific customer
2.1.5 Reference
A custom reference for your customers. You can search by reference in the search bar in the top menu (just click on the magnifying glass icon to use the search bar)
2.1.6 Theme
Invoice themes determine the look of the invoice, and can be added on the Settings > Configure system > Invoice themes menu.
2.1.7 Description
A description of the invoice item.
2.1.8 Account code
Account codes determine which report the balance of the transaction appear on, some are balance sheet accounts and others are Profit & Loss accounts.
2.1.9 Qty, Unit price, VAT rate, VAT Value, Gross
You can enter the quantity, unit price and VAT rate and the system will calculate the VAT amount and gross automatically.
Alternatively, you can enter the gross, VAT rate and quantity to calculate the unit price automatically.
If you select a Manual VAT rate, you can enter an amount in the VAT Value box.
2.1.10 Add new line
You can add multiple items on an invoice by hitting the Add new line link. By default only 1 line is generated, however, you can increase this on the Settings > Configure system > Invoice preferences menu.
2.1.11 Summary
Enter the summary of the invoice if necessary.
2.1.12 Bank account to display
Select a bank account in the 'Bank details to display'. The payment details of this bank account determine the payment details on the payslip of the invoice.
How to show payment details on an invoice
2.1.13 Invoice payment text
The default invoice payment text is pulled from the Settings > Configure system > Invoice preferences menu or from your custom invoice theme on the Settings > Configure system > Invoice themes.
You can edit the text for an individual invoice by clicking on the Edit invoice payment link.
2.1.14 Attachments
Click on the Manage attachments link to upload and store files against this invoice. Allowed file-types are: bmp, gif, jpg, jpeg, pdf, png, doc, odt, docx, xls, xlsx, ods, rtf, csv, these files are not included in any emails.
How to add attachments when creating an invoice
2.2 Save, Save draft & Refresh Invoice
Save the invoice as a draft using the 'Save draft' button (which can be approved at a later date) or approved (unpaid invoice) by using the 'Save' button.
If you have filled in the details of your invoice but have added a new project/account code/bank account/stock item etc. in another tab, just hit the 'Refresh' button and the details you have entered will remain, however, you can now select the new data you have added.
3. Additional Invoice Features
Below is a list of additional features which may need to be toggled on to be able to use them on the invoice create menu.
3.1 Discounts
A discount percent can be applied to the total value of an invoice using our discounts feature, or if you need to discount a particular line of an invoice you can apply this by adding a negative line item.
3.1.1 Adding a discount percent to the full invoice
The discount feature is toggled on from the Settings > Configure system > Toggle features > Invoicing & expenses menu:

This will add a discount % field to the invoice create form:

When you hit the 'Save' button, the discount will be applied to the total value of the invoice and will appear as a new line item:

3.1.2 Adding a discount to a line item on the invoice
If you have multiple line items on an invoice and would like to discount a specific line amount rather than the full invoice amount, you will need to create a new line on the invoice for the discount.
Make sure to enter the unit price as a negative amount, in this example, I am discounting the second line item by 10%.

3.2 Accrual Dates
In cases where you have raised the invoice but have not yet delivered the goods or services, you are able to utilise accrual dates so that the revenue is realised in the related period.
An example would be if you are a business which supplies a training service, where you may invoice the customer on 01/01/18 but the training is not carried out until a month later. Therefore, you are able to input an accrual date of 01/02/18 so that the revenue is recognised in the correct reporting period.
Navigate to the Settings > Configure system > Toggle features > Accounting tab and toggle on 'Accrual dates'.

3.3 Projects
If your company works on a project basis, it may be useful to see profit and loss or cashflow for each specific project. The project feature allows you to create projects and assign them to an invoice or to specific invoice items.
Click here to learn more about Projects
3.4 Stock
If your company manages stock or even if you don't but do re-use specific invoice items repeatedly, you can enable the stock feature to allow you to select a stock item (or regular invoice item) when creating the invoice.
Click here to learn more about stock
3.5 Multi currency
You can create multi currency invoice if you are subscribed to the Large plan. You can use custom rates or the automated rate which we fetch from XE.com
Click here to learn more about Multicurrency
3.6 VAT Treatments
If you sell to companies outside of the UK, you can enable VAT treatments which will provide you with the following options: Sales to EU customer, Goods to EU customer, Services to customer outside EU and Goods to customer outside of EU. The VAT treatment used will determine how the VAT return treats the invoice.
Click here to learn more about VAT treatments
3.7 Additional Payment Methods
Below is an image of the invoice additional Payment Methods, this is here for you to select a different payment option (Instant Bank Payments, Stripe, PayPal) directly for a certain invoice. Or to disable them as shown below:
Click here to learn more about Instant Bank Payments (IBP)
3.8 Show both a delivery address and an invoice address on an invoice
When creating or editing a sales invoice you can choose to show both the invoice and delivery address on the invoice PDF, however, both addresses must be filled out for the contact you are invoicing.
Navigate to Contacts > Customers.

Click the Edit Contact link beside the appropriate customer.

Fill in both the Invoice Address and Delivery address.


Create a new invoice for this customer.
The invoice should now display a checkbox to display both invoice and delivery address just below the summary box.

Was this article helpful?
That’s Great!
Thank you for your feedback
Sorry! We couldn't be helpful
Thank you for your feedback
Feedback sent
We appreciate your effort and will try to fix the article