Table of Contents
2.1.2 Add your employer contact details.
2.1.4 Add your employer workplace pension dates
2.1.5 Add your employer opening balances
2.2.2 Opening Balances for employees/directors
2.2.2 Off-payroll working (IR35)
2.2.3 Import suppliers from Accounts as an employee
2.3 Add your Pension Scheme(s)
2.3.2 Update Pension details for employees
3.1 Submit an Employer Payment Summary
3.2.1 Statutory maternity pay calculator
3.5 Send pension contribution report to the pension scheme
4.1 View your employee P45 and P11s
4.3 View RTI submissions report
4.4 View the summary of bill due to HMRC
5. Ongoing Auto Enrolment compliance
5.1 Assess the workforce regularly
5.2 Add remove employees from pension scheme as appropriate
5.4 Submit pensions contribution report to pension scheme each payday
6.1 Frequency, pay date and payslip email options
6.2 Map the account codes used on bills
1. Introduction
Clear Books' online payroll software makes it easy to calculate pay, produce payslips and report to HMRC. This is a complete and comprehensive collection of all Clear Books Payroll guides, showing how to use every feature available.
2. Setting up Payroll
As a new comer to Payroll you can begin with sections 2 and 3 in chronological order, however, sections 4, 5 and 6 can be read in any order.
2.1 Add your employer details
Navigation: Employer > Details
The best place to start in Payroll is to complete your Employer details. This menu has multiple tabs which are all explained below
2.1.1 Employer
Navigation: Employer > Details > Employer
The below describes what each field on the menu does.
The 'Employer name' will have been defined by the organisation name used during registration.
The 'HMRC office name', 'PAYE reference' and 'Accounts office reference' can be found in your HMRC’s Online Services portal or on paperwork received from HMRC. It is important to fill in the 'PAYE reference' and 'Accounts office reference', as this will allow you to submit Full Payment Submissions and Employer Payment Summaries to HMRC.
'This PAYE scheme is eligible to claim employment allowance, based on the current tax year' is the Employment Allowance checkbox. Tick this box (and send an Employer Payment Summary to HMRC after the setup process- as explained in section 2.1 this guide) if you are entitled to claim employment allowance.
Employment Allowance
The 'Payroll payment method' you choose will appear on employee payslips.
Enter a 'BACs payment sort code' only if you use your own BACS Service User Number. This is sent to HMRC in Real Time Information submissions.
Real Time Information: generating the cross reference
Select a contact in the 'Payroll HMRC contact' drop-down if you use our Accounting module. It is important to select the relevant HMRC contact so that when importing payroll into accounts, the bills will be allocated to the correct supplier.
Likewise, you will have to select the relevant 'Pension Entity' set up in Accounting in the drop-down provided so that when importing payroll into accounts, the bills will be allocated to the correct supplier.

2.1.2 Add your employer contact details.
Navigation: Employer > Details > Contact details
Click on the 'Address' link on the left hand side to be able to fill in the company’s address. The company address is used on Full Payment Submissions to HMRC.
You can also add in the email address used to send emails.

2.1.3 Add your Logo
Navigation: Employer > Details > Logo
Add in a logo which will then appear on your payslips. The image type of files accepted are png, jpg, gif and jpeg.

2.1.4 Add your employer workplace pension dates
Navigation: Employer > Details > Pension
Here you can add in some key dates for your workplace pension.
Your automatic enrolment duties start when you employ your first member of staff. Once you know the duties start date, you will need to update the 'Duties start date' in Clear Books Payroll to reflect this.
Duties start date
Eligible jobholders can opt out or cease membership of a qualified pension scheme. As an employer you have a duty to put these eligible jobholders back into a pension scheme on a periodic basis - approximately every 3 years after your duties start date. This date is known as the cyclical re-enrolment date and you can enter this here.
Re-Enrolment
You can choose to delay assessing the workforce for up to three months for some or all of your staff. You must write to your staff to tell them what you are doing and how automatic enrolment applies to them. Enter the date here if you would like to a postponement date for all of your staff.
Postponement
Make sure to hit the Save button after any changes.

2.1.5 Add your employer opening balances
Navigation: Employer > Details > Opening balances
If you are starting Clear Books mid way through a tax year and have already claimed Statutory payments, CIS deductions or employment allowance, select the 'Yes' option on this page.
Next select the last processed pay for any frequencies that you ran on the previous system.
Finally add in the amounts that you have already claimed. These figures will be taken into account on any future Employer Payment Summaries (EPS) that you submit to HMRC.

2.2 Add an employee/director
Navigation: Employees > View
From the Employees > View menu, click on the 'Add employee/director' button to begin filling in the details of a new employee/director.
The required fields are for the purpose of both payroll wage calculations and requirements from HMRC for Real Time Information submissions (i.e FPS and EPS).
The required fields are marked with an Asterisk and each tab will show a red asterisk until all the required fields within that tab are entered. You will not be able to save an employee/director until all the required fields are populated.
Some of the important fields are described below:
Employment details > Employment start date This is the start date of the employee. If the employee starts part way through a period, their pay will be pro rata. You will only be able to change this date by making sure to undo all their pay calculations. However, if you have already submitted an FPS to HMRC you will be unable to change this date.

2.2.2 Opening Balances for employees/directors
If you have run payroll on another system for the current tax year and are therefore joining Clear Books Payroll part way through the tax year, make sure to add employer opening balances on the Employer > Details > Opening balances menu. This will then allow you to add opening balances for your employees/directors depending on their employment start date.
When adding an employee/director to the system, if their employment start date is before your employer opening balance, then we will show the opening balance tab.
A P11 from your previous payroll system will help you fill in these details correctly
2.2.2 Off-payroll working (IR35)
The off-payroll working rules, commonly known as IR35, are a piece of legislation brought into place to ensure that contractors working like employees via their Personal Service Company (PSC) pay similar levels of tax and national insurance to those who are employed directly.
If an engagement between a contractor and their client is considered to fall within these rules (known as ‘deemed employment’), then the contractor is required to be treated as an employee for tax purposes only.
Understanding off-payroll working (IR35)
Clear Books Payroll will allow you to flag the employee as an off payroll worker in your full payment submissions (FPS) to HMRC.
Navigate to the Employees > View menu.
Either add a new employee or click on the name of an existing employee to edit their details.
If you are adding a new employee make sure to update all the required details in each tab of the employee form.
For the off payroll worker option, click on the ‘Employment details’ tab and tick the ‘Off payroll worker’ checkbox.
Save the employee.

There are a number of additional things to note if the employee has the off payroll worker option enabled:
- An ‘off payroll worker’ flag is submitted on full payment submission (FPS). This will inform HMRC of any employees considered to be off payroll workers.
- Statutory payments are disabled for off payroll workers.
- Pension calculations are disabled for off payroll workers.
- Employment allowance is not used against off payroll workers.
2.2.3 Import suppliers from Accounts as an employee
Navigation: Employees > View
You can import suppliers from the Accounts module using the Import supplier button on the View menu. You can select the supplier from the drop down list and then hit the Import button.

2.3 Add your Pension Scheme(s)
Navigation: Pensions > Pension Scheme
If you employ any staff, you may need to enrol them in a workplace pension scheme.
The Pensions Regulator - Employers
Once you have set up a pension scheme with a provider, you will need to create a pension scheme for this in Clear Books Payroll. If you already have an existing pension scheme, you will also need to add this into Clear Books Payroll.
Navigate to Pensions > Pension Scheme and click the 'Add new pension scheme' link.
The fields shown on the pension scheme form are shown below, however, at a minimum, you will only need to fill in the required fields which are identified with an asterisk.
Scheme Name: The name of the pension scheme into the Name field.
Scheme Provider: The name of the pension provider into the Provider field.
Qualified Pension Scheme: Select the checkbox if it is a Qualified pension scheme
Employer Pension Scheme Reference: An Employer Pension Scheme Reference (EPSR) is a mandatory unique reference number for your pension scheme normally found on your correspondence from your pension provider. For personal pensions, this may be known as the group policy number. For the National Employment Savings Trust (NEST), this is known as the unique employer NEST ID. If you are unsure please contact your Pension Provider.
Pension Scheme Registry Number: A Pension Scheme Registry (PSR) number is an 8-digit number starting with a 1. If you have a NEST pension scheme, please leave this field blank. It's not to be confused with the Pension Scheme Tax Reference (PSTR). If you are unsure please contact your Pension Provider.
Tax Relief:
- Select Net pay arrangement if the pension contribution is taken before the calculation of tax and NIC
- Select Basic rate tax relief at source if pension contributions are taken after the calculation of tax and NIC. Your pension provider adds the tax relief to the pension at the basic rate.
- Select No tax relief if the scheme does not allow for tax relief contributions
Earning basis:
- Select Apply contributions to all pensionable pay if your pension scheme works out contribution amounts based on all earnings from the first £1 earned
- Select Apply contributions to banded qualifying earnings only if your pension scheme works out contribution amounts based on earnings that are between the lower and upper limits.
For example, if the employee is paid monthly and earned £1000, you’ll need to subtract the threshold of £512 from the total pay (£1000 minus £512) to get the pensionable pay of £488. You’ll then need to calculate the contributions based on that amount.
If the employee is paid monthly and earned £5000, you’ll need to subtract the upper threshold of £4167 from the lower threshold £512 (£4167 minus £512) to get the pensionable pay of £3655. You’ll then need to calculate the contributions based on that amount.
| Frequency | Lower level of qualifying earnings | Upper level of qualifying earnings |
| Weekly | £118 | £962 |
| Fortnightly | £236 | £1,924 |
| Four weekly | £472 | £3,847 |
| Monthly | £512 | £4,167 |
Supplier in Accounting: Select the supplier (from the accounts module) that you want the bills for this scheme to be created against when importing into accounts.
Click the 'Save pension scheme' to complete.

2.3.1 Assess the Workforce
Navigation: Pensions > Reports > Assess the workforce
If you employ people, part of your pensions duties requires you to assess your staff for eligibility. Clear Books Payroll has a report that will assess your staff, enabling you to see who is and who isn't eligible.
We assess using tax pay reference periods (starting 6th April) rather than regular wage periods (1st-31st).Select the year, payroll frequency and period, then click the 'View assessment' button. The report will run and the result will be shown on screen

Once you have run the 'Assess the workforce' report you need to identify which staff to automatically enrol and which have a right to join the scheme on request.
There are three classifications - Eligible jobholder, Non-eligible jobholder and Entitled worker. You have duties to carry out for each worker - actions to take are listed below.
For Eligible jobholders you have a duty to automatically enrol them into your automatic enrolment pension scheme and pay employer contributions.
- By law you must enrol the employee into your pension scheme - this must be done directly with your pension provider. Please speak to them if you are unsure how to do this.
- Promptly send any information the pension provider has asked for.
- By law you must send communications to your employees to inform them that you are enrolling them into a pension scheme. Use this letter template for staff who are automatically enrolled: http://www.thepensionsregulator.gov.uk/docs/Letter-template-for-employees-who-are-being-automatically-enrolled.doc
For Non-eligible jobholders you have a duty to notify them of their eligibility to join the automatic enrolment pension scheme. Those who provide you with a valid 'opt in' notice will need to be enrolled into your automatic enrolment pension scheme and you will need to pay employer contributions.
- By law you must send communications to your employees to inform them of their entitlement to opt in to a pension scheme. Use this letter template for staff who are not automatically enrolled: http://www.thepensionsregulator.gov.uk/docs/Letter-template-for-those-not-automatically-enrolled.doc
For Entitled workers you have a duty to notify them of their eligibility to join a pension scheme. Only those employees who provide a 'joining' notice will you then be required to enrol into a pension scheme (this does not have to be the automatic enrolment scheme) however, you are not obliged to pay employer contributions.
- By law you must send communications to your employees to inform them of their entitlement to join a pension scheme. Use this letter template for staff who are not automatically enrolled: http://www.thepensionsregulator.gov.uk/docs/Letter-template-for-those-not-automatically-enrolled.doc
2.3.2 Update Pension details for employees
Navigation: Employees > View
When you have run the 'Assess the workforce' report, you need to manually update the employee's 'Auto enrolment status' as well as other fields relating to the workplace pension. This helps you to remember what status they have and changes the way Clear Books Payroll deals with that employee.
Click on the name of the employee and select 'Pension details' from the left hand side menu.

The 'Worker category' field is automatically set after running the Assess the workforce report.
Set the 'Auto enrolment status' field by selecting the appropriate status from the drop down. See the below table for guidance.
| Auto enrolment status | When to choose this option | Actions you need to take |
| Enrolled in qualified pension scheme | The employee is in a qualified pension scheme therefore Clear Books Payroll should take deductions from their pay | Fill out the following fields in the employee details form:
|
| Enrolled in pension scheme | The employee is in a non-automatic enrolment pension scheme therefore Clear Books Payroll should take deductions from their pay. Normally this is because the employee is an 'Entitled worker' and submitted a 'Join' notice. | Fill out the following fields in the employee details form:
|
| Employee opted in | You (the employer) has received an opt in notice from a non-eligible jobholder, but have not yet enrolled the employee in a qualified pension scheme. | Fill out the following fields in the employee details form:
|
| Employee opted out | You (the employer) has received an 'Opt out' notice from an employee, therefore Clear Books Payroll needs to cease taking deductions from their pay. Cyclical automatic re-enrolment is now applicable to eligible jobholders who have opted out of a pension scheme after your staging date. | Fill out the following fields in the employee details form:
Tick the 'Wait until re-enrolment' checkbox. |
| Entitled worker joined | You (the employer) has received a 'Join' notice from an entitled worker, but have not yet enrolled the employee in a non-automatic enrolment pension scheme. | Fill out the following fields in the employee details form:
|
| Postponed | You (the employer) has decided to postpone this employee's auto enrolment assessment. | Fill out the following fields in the employee details form:
|
| Excluded | The employee is not making contributions to any pension scheme. This could be because:
| Select one of the following fields in the employee details form:
|
| Not contributing | If the employee is a non-eligible jobholder or an entitled worker and they are not in a pension scheme, and you (the employer) have not received an 'opt in' or 'join' notice. | N/A |
If you are unsure of the contribution amounts, please contact your pension providerClear Books Payroll supports the government tax relief where the government pay 20% of contributions and the employee pays 80%. This is automatically taken into account for relief at source schemes, when calculating deductions so in the 'Employee's pension contribution (%)' field, still enter the full % amount.
For example, if the overall employee contribution is 1% enter this amount to Clear Books Payroll and Clear Books will only deduct 0.8% from the employee to account for the government tax relief.
When using salary sacrifice, the contributions % is based upon the nominal salary.
2.3.3 Declare your compliance
The Pensions Regulator requires that you send information to them about how many of your employees you have enrolled. Clear Books Payroll enables you to send details about the employees who you have automatically enrolled and which pension scheme(s) they are in as part of your Declaration of Compliance. You must still provide this information to them even in you have not enrolled anyone. Your declaration deadline is five calendar months after your staging date.
Declare your compliance
To retrieve these details navigate to Pensions > Reports > Employee pensions
- Select the last pay reference period's tax year from the View by year drop down
- Select the Payroll frequency from the drop down
- Select the period from the View period drop down
- Click the View report button
- You can click the Export report as CSV button or choose the drop down to Export report as PDF
You must then take this information outside of Clear Books Payroll and log into The Pension Regulator's Government Gateway website where you can enter in the relevant information there.

3. Process pay
The Payroll menu allows you to view and process payroll. The 'Overview' will show you a summary of all combined employee pay and taxes for a tax year within a specific frequency. The 'Period' will allow you to process pay for a particular period in a tax year for your chosen frequency. You will also be able to manage your Real Time Information (RTI) submissions to HMRC and view how much you owe to HMRC.
3.1 Submit an Employer Payment Summary
EPS are submitted from the Payroll> RTI > File EPS menu. You can submit an EPS for different tax years using the 'Submission tax year' drop down field.
An Employer Payment Summary allows you to reclaim statutory maternity, paternity, adoption or shared parental payments, Employment Allowance, Construction Industry Scheme (CIS) deductions as a limited company. You must also report any periods of inactivity.
The date at which you submit an EPS is determined by HMRC for example, to be entitled to employment allowance you must submit an EPS at the start of the tax year whereas for things like statutory pay the deadline is the 19th of the following tax month.
Send an EPS instead of an FPS if you’ve not paid any employees in a tax month.Running payroll: Reporting to HMRC:EPS

3.2 Process pay per employee
Navigation Payroll > Period > [and your frequency]
Select the appropriate date using the date filters and click the Process link on the row of the employee you wish to process.

The pay form will fill the employee tax code and salary based on the details of the employee, use the Edit Details button if you need to make any changes.
The default payday can be updated on the Settings > General menu.
Make sure the basic pay is correct, if the employee started (or left) mid-period then the pay will pro-rata.
Click on the appropriate button to add in any pre-tax payments. Click on the Add deduction button to enter the details of any pre-tax deductions the employee may have.
The gross and net pay will calculate below the pre-tax payments.
For tax-exempt payments and deductions, click on Add Post-Tax Payments or Add Post-Tax Deductions as required.
Total pay and taxes for year to date will appear in the 'Previous totals to date' box. If you have entered a pension for the employee this will default in the 'Pension' box. Select the 'Automatically email payslip to employee' check box if the payslip is to be sent automatically on the date provided in the 'Email date' field.
Once you are finished, click the Complete button.

3.2.1 Statutory maternity pay calculator
Navigation: Employees > Statutory Payments
To be entitled to SMP your employee must have worked for you for 26 weeks going into the qualifying week (i.e. you must have processed pay in Payroll for this employee for the previous 26 weeks).
Also, the employee's average weekly earnings are greater than £111.
Statutory Maternity Pay
Once you have process SMP for the employee you can reclaim by submitting and EPS. The EPS form will update automatically with the correct amounts.
Get financial help with statutory pay
Head to Employees > Statutory Payments, select the relevant 'Employee' from the drop down list, enter the 'baby due date' and hit the 'Calculate' button.

The employee's AWE (average weekly earnings) will automatically be calculated based on the baby due date you entered and the employee's earnings to date.
Enter the 'Requested MPP (Maternity Pay Period) start' for the employee and the end date if known or leave this blank to calculate automatically.
Click on the 'Save' button to complete.

When processing payroll for the employee the basic pay field will be clear and the SMP field is updated automatically.
To reclaim the employees SMP you will need to submit an EPS on the Payroll > RTI > File EPS menu. The EPS will automatically update the 'YTD SMP recovered' box with 92% or if you are eligible to reclaim 103%, both the 'YTD SMP recovered' and 'YTD SMP NIC recovered' boxes will be updated appropriately.
3.2.2 Process pay in bulk
Navigation: Payroll > Period > [and your frequency]
Select the appropriate date using the date filters. Tick the check box in the column header to select all the employees or tick the check boxes beside each employee to select specific employees.
Press the 'Process Selected' button to calculate the wages for the selected employees.

3.3 Full Payment Submission
An FPS is generated each time you process payroll and needs to be submitted on or before every pay day.
Running Payroll: Reporting to HMRC:FPS
You can only submit the FPS of one period at a time e.g you cannot process April and May and submit the outstanding FPS in May. You must process April and submit the outstanding FPS and then process May and submit the outstanding FPS separately.
Any starter and leaver information will be automatically picked up based on the start or end date entered for the employee - you can change the leaving and starting date at this stage by clicking on the link.
You should carefully review all information before clicking on the Send to HMRC button.
You will be notified if there are any errors which have led to your submission being rejected. You can check the submission on the Payroll > RTI > Submission menu.
If you have made a mistake and need to re-submit an FPS, the new submission for the period will supersede your previous submission.
If you submit a late FPS, you will need to provide a late submission reason on the submission review screen. The deadline for all FPS submissions for the tax year is the 19th April.
When you are submitting your final FPS of the year, make sure to tick the appropriate checkbox.

3.4 Import Pay into Accounts
Navigation Payroll > Period > [and your frequency]
Make sure that all the employees in the period have had their wages calculated. Hit the 'Import into Accounts' button.

You can view the imported data by navigating to Purchases > Bills > Unpaid in Accounts. Listed here should be a bill to your HMRC entity for the NICs and tax due. Also, there should be an unpaid bill for each of the employees for their wages.
3.5 Send pension contribution report to the pension scheme
Navigation: Pensions > Reports > Pensions contributions
You will need to give updates to your pension provider each time you deduct pension contributions from your employees. You can use the pensions contributions report to see details of a specific pay reference period for each pension scheme.
- Select the last pay reference period's tax year from the View by year drop down
- Select the Payroll frequency from the drop down
- Select the period from the View period drop down
- Click the View report button
- You can click the Export report as CSV button or choose the drop down to Export report as PDF
You should check with your pension provider to see which specific details they may need from the pensions contributions report. If they need selective information or information in a different format, you should take the contributions report that Clear Books Payroll generates and open in a spreadsheet software outside of Clear Books Payroll to edit the CSV file as needed.

4. Reports
4.1 View your employee P45 and P11s
Navigation: Employees > View
From the view menu you can switch to view 'All', 'Current' or 'Former employees'. You can also view a P11 or P45 (for former employees).
As long as you have not processed any pay for an employee, you can remove them if you have created a duplicate, by clicking on the bin icon.

4.2 View P60s
Navigation: Employees > P60
P60s are available to print and email as soon as the current tax year has ended on the 6th April.

4.3 View RTI submissions report
Navigation: Payroll > RTI > Submissions
The submissions menu is an audit of the RTI you have sent to HMRC. This menu will list all the Employer Payment Summary (EPS) and Full payment submissions (FPS), the tax year they relate to, the correlation ID of the submission (this is a receipt sent from the HMRC system to confirm that they have received it), the submitter, the time and the status.
4.4 View the summary of bill due to HMRC
Navigation: Payroll > HMRC bill report
The HMRC bill report is the break down of what needs to be paid to HMRC each period.

5. Ongoing Auto Enrolment compliance
You duties don't end after your duties start date, you must continue to monitor your staff and add/remove them as appropriate to/from your pension scheme.
Ongoing Duties
5.1 Assess the workforce regularly
You must regularly monitor which staff to see if their circumstances mean that they are eligible for a work place pension.
If you have any staff who are:
- aged between 22 up to state pension age
- and earn over £10,000 per year, or £833 per month or, £192 per week
you must put them into your pension scheme and you must both pay into it.
5.2 Add remove employees from pension scheme as appropriate
You must add staff if they send a letter to opt in and are eligible to join a workplace pension, and you must remove staff if they send a letter to opt out.
Manage requests to join or leave your scheme
5.3 Keep records
By law you must keep records of your automatic enrolment activities. We recommend you maintain your own records outside of Clear Books to fulfil these requirements.
Some of the information you will need to save includes:
- The information you sent to your pension provider
- Changes to an employee's worker category (you could download the 'Assess the workforce' report in Clear Books Payroll to help with this)
- Copies of any opt-in, join and opt-out requests you receive
Detailed guidance on keeping records
5.4 Submit pensions contribution report to pension scheme each payday
You will need to submit a pension contribution report to your pension provider each payday. After you have processed pay you can run and export the pension on the Pensions > Reports > Pensions contributions.
5.5 Re-enrolment
You will need to re-enrol staff who have left the scheme or now meet the criteria for a workplace pension. R-enrolment is cyclical and happens every 3 years.
Check that you have staff to put back into your pension scheme. Write to staff that you’ve put back into your pension scheme. You will then have to complete a re-declaration of compliance with the Pension Regulator.
Re-enrolment
6. Settings
6.1 Frequency, pay date and payslip email options
Navigation: Settings > General
In the general settings you can select the payroll frequencies that you would like to be able to see under the Payroll > Overview menu. If you only pay your employees a monthly salary then you can disable all other frequencies for clarity.
You can also enter the specific pay day for each frequency appropriate to you. The 1st day in the Weekly, Fortnightly, Fourweekly and Quarterly is the first day of the new tax year i.e. whichever day the 6th April aligns with.
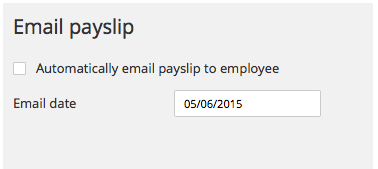
The Payslip can be emailed directly to your employee by ticking the Enable payslip emails by default checkbox. You can also specify the day on which the Payslip should be emailed using the drop down box below this. Finally, you can update the colour of the payslip using the colour matching tool.

6.2 Map the account codes used on bills
Navigation: Settings > Advanced
The advanced settings allow you to re-map the account codes used on the bills that are created when payroll is imported into the Accounts module.
You can create new accounts in the Accounts module.
How to add new account codesMake the required changes by selecting an appropriate account code in the drop-down list.
By default, the Employee's and Employer's pensions drop down defaults to the same Pension account code. You can create new separate account codes in the Accounts module for both Employee's and Employer's pensions, and then map them appropriately as shown below.
6.3 Email Templates
Navigation: Settings > Email Templates
On the Email templates menu, you can update the default message on payslip emails.
Fill out the 'Subject' and 'Message'. By default the message will encourage your employees to log in to Payroll with their own credentials.
Invite your employees in to Clear Books Payroll to view their own payslip
Use the 'Token' drop-down field in the formatting tool bar to select a place holder. When an email is created, the place holders are turned into data as illustrated by the examples.
| Place holders | Examples | Data Pulled from |
| Employee Full name ::their_name:: | Mr Joe Bloggs | Payroll > Employee |
| Employee First name ::their_first_name:: | Joe | Payroll > Employee |
| Employee Last name ::their_surname:: | Bloggs | Payroll > Employee |
| Tax period ::tax_period:: | 30/09/2020 | Payday |
| Company name ::my_company:: | Clear Books Ltd | Payroll > Employer |
The Payslip is included as a PDF attachment on the email.
Was this article helpful?
That’s Great!
Thank you for your feedback
Sorry! We couldn't be helpful
Thank you for your feedback
Feedback sent
We appreciate your effort and will try to fix the article