The help guide series for our Full Accounting productThis guide walks you through fully integrating your PayPal Business account with Clear Books. You will learn how to add your PayPal account, automate your transaction imports, and add a 'Pay Now' button to your invoices to get paid faster.
1. Set up a PayPal bank account
Adding a PayPal bank account in Clear Books allows you to use the direct import statements feature and display a Pay Now button on your customer invoices.
Here is how to set it up:
1.1 Navigate to Bank Accounts: From your main dashboard, go to Money > Bank accounts.
1.2 Add a New Account: Click the Add Account button.
1.3 Select PayPal: Find the Online payments section and click the plus (+) icon next to it to create a new PayPal account entry in Clear Books.
1.4 Configure Account Settings: Requires email verification. Fill in the configuration details for your new account:
- Payment Provider: Select PayPal.
- Currency: Set this to match the default currency of your actual PayPal account.
- Email: Enter the exact email address linked to your PayPal account.
Important: If you want to import statements from PayPal, your email address must be verified. After saving your new account settings, Clear Books will send a verification email to that address. You must click the link in that email before the import feature becomes active.

2. Automatically import PayPal transactions
This tool automatically imports transactions and can create entities automatically from your Paypal merchant account. This feature supports PayPal business accounts only. A PayPal account must be set up on your Clear Books business first before these steps can be completed.
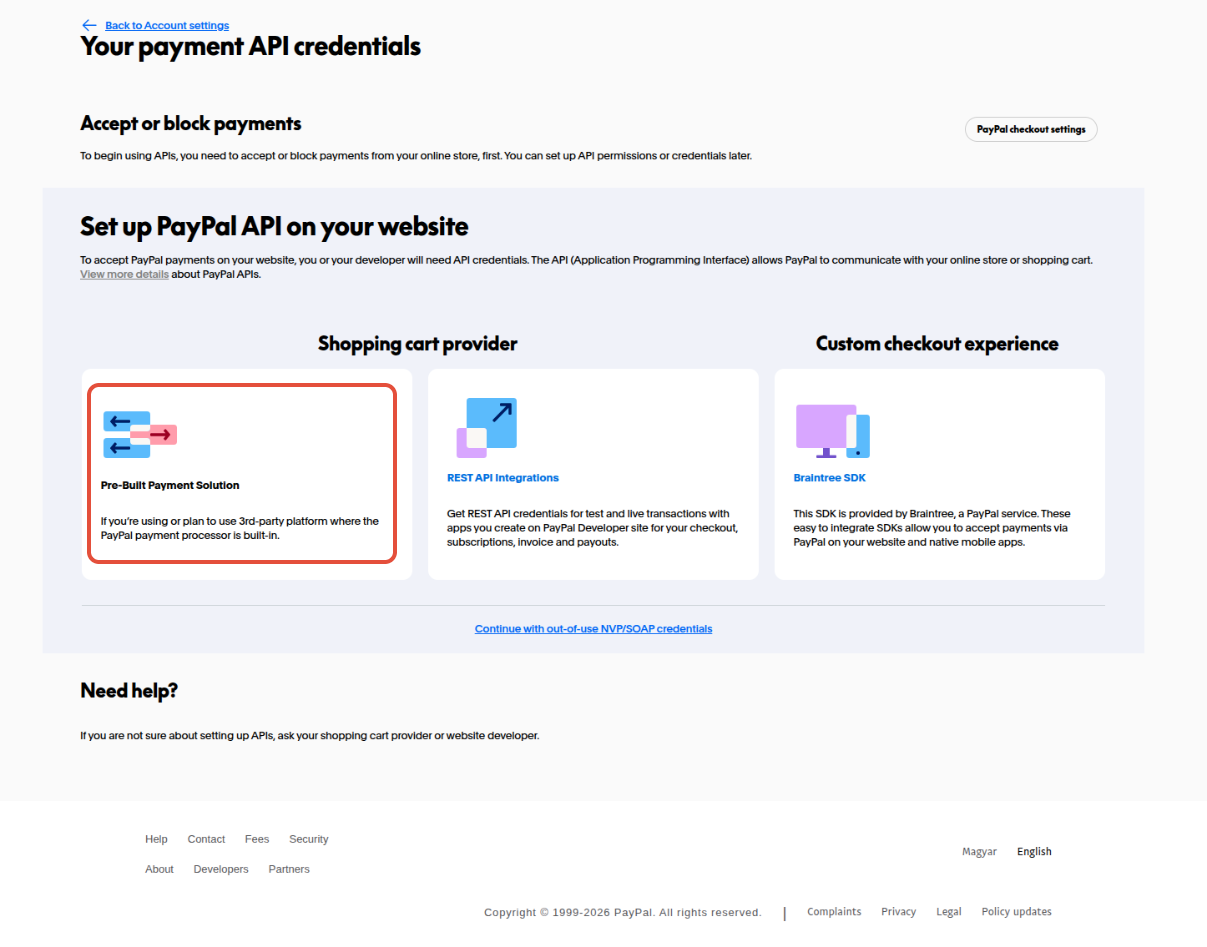
2.1 Access PayPal settings: Login to your PayPal business account and navigate to the Account Settings > Your Payment API credentials page.
2.2 Select payment solution: Click the leftmost tile labeled Pre-built payment solution.
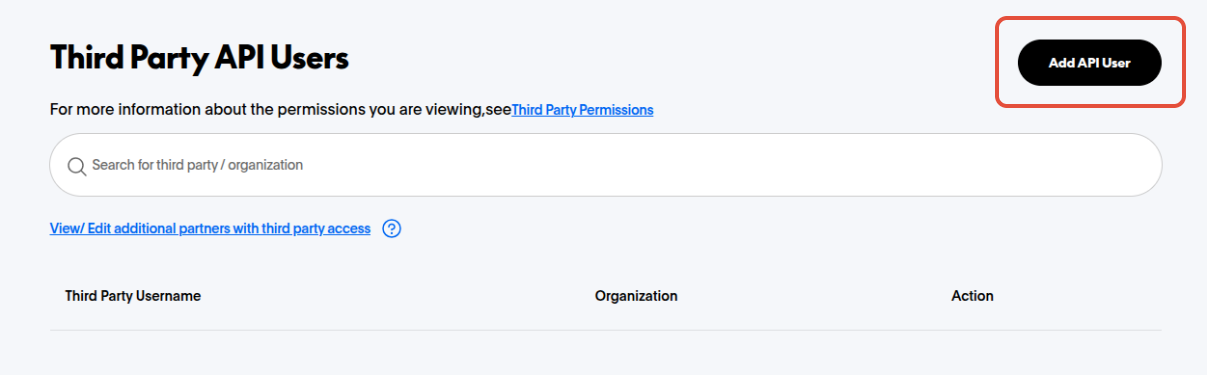
2.3 Add API User: On the next page, click the Add API User button.
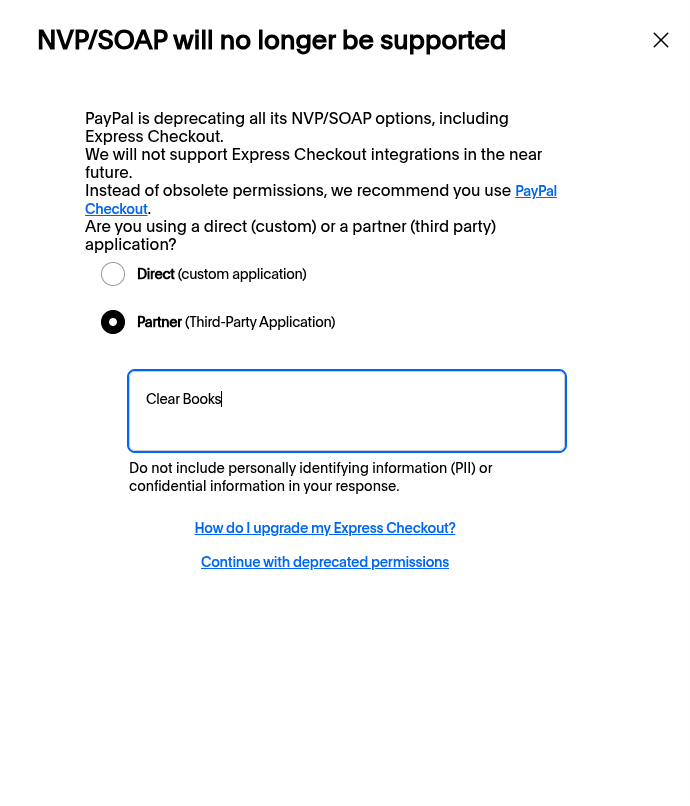
2.4 Configure partner access: In the popup window, choose Partner (Third-Party Application) and type Clear Books into the text field. Then, click the 'Continue with deprecated permissions' link at the bottom.
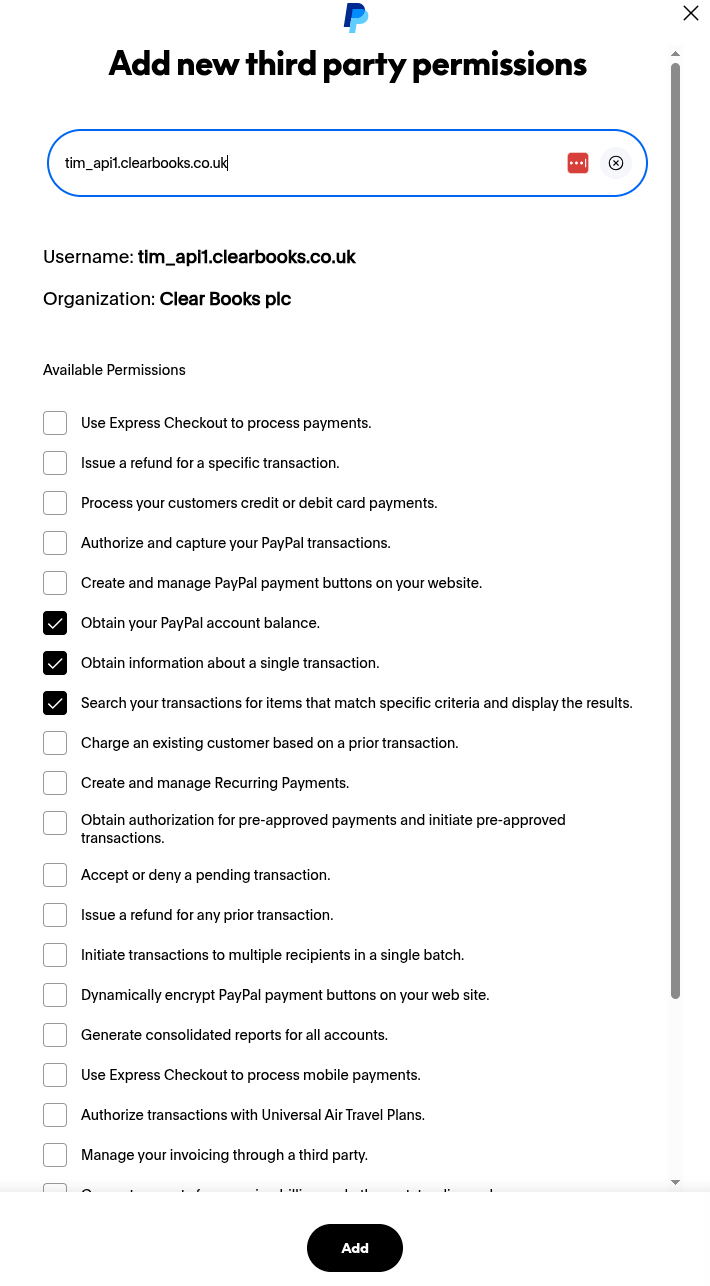
 2.5 Enter API username: On the following page, enter tim_api1.clearbooks.co.uk into the text field and press Enter on your keyboard.
2.6 Set PayPal permissions and save: If entered correctly, a list of permissions will appear. Select the three required permissions (Obtain your PayPal account balance, Obtain information about a single transaction, Search your transactions for items that match specific criteria and display the result) and click Add.
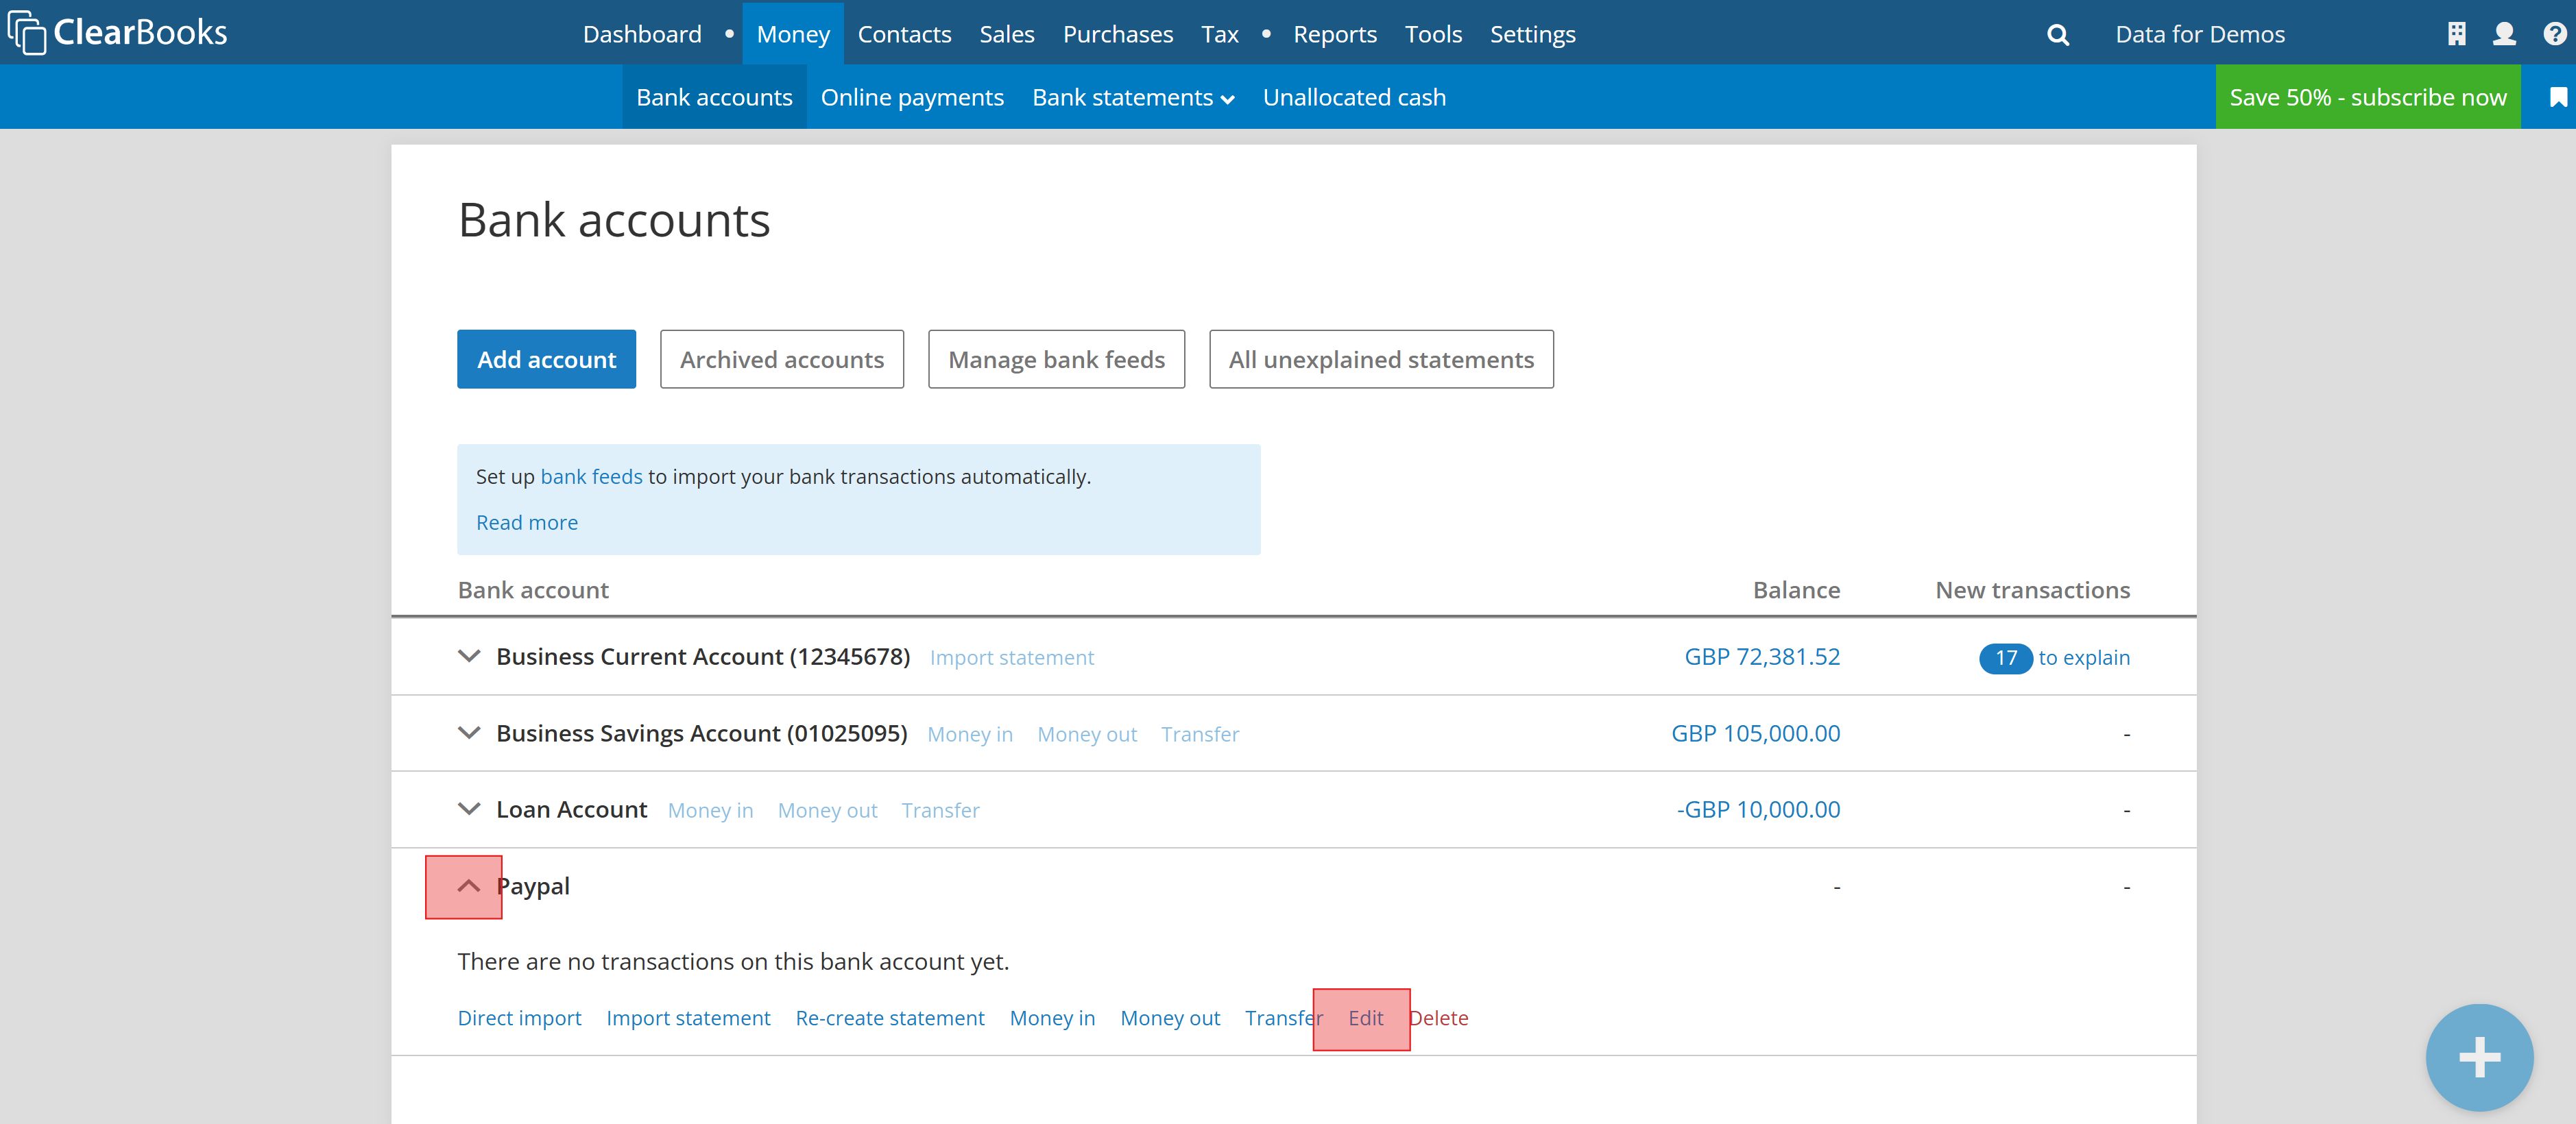
2.7 Edit Clear Books bank details: Log in to Clear Books and navigate to Money > Bank accounts. Click on the "Edit" link next to your Paypal account. You may need to click on the down arrow beside your PayPal account to view the full list of options.
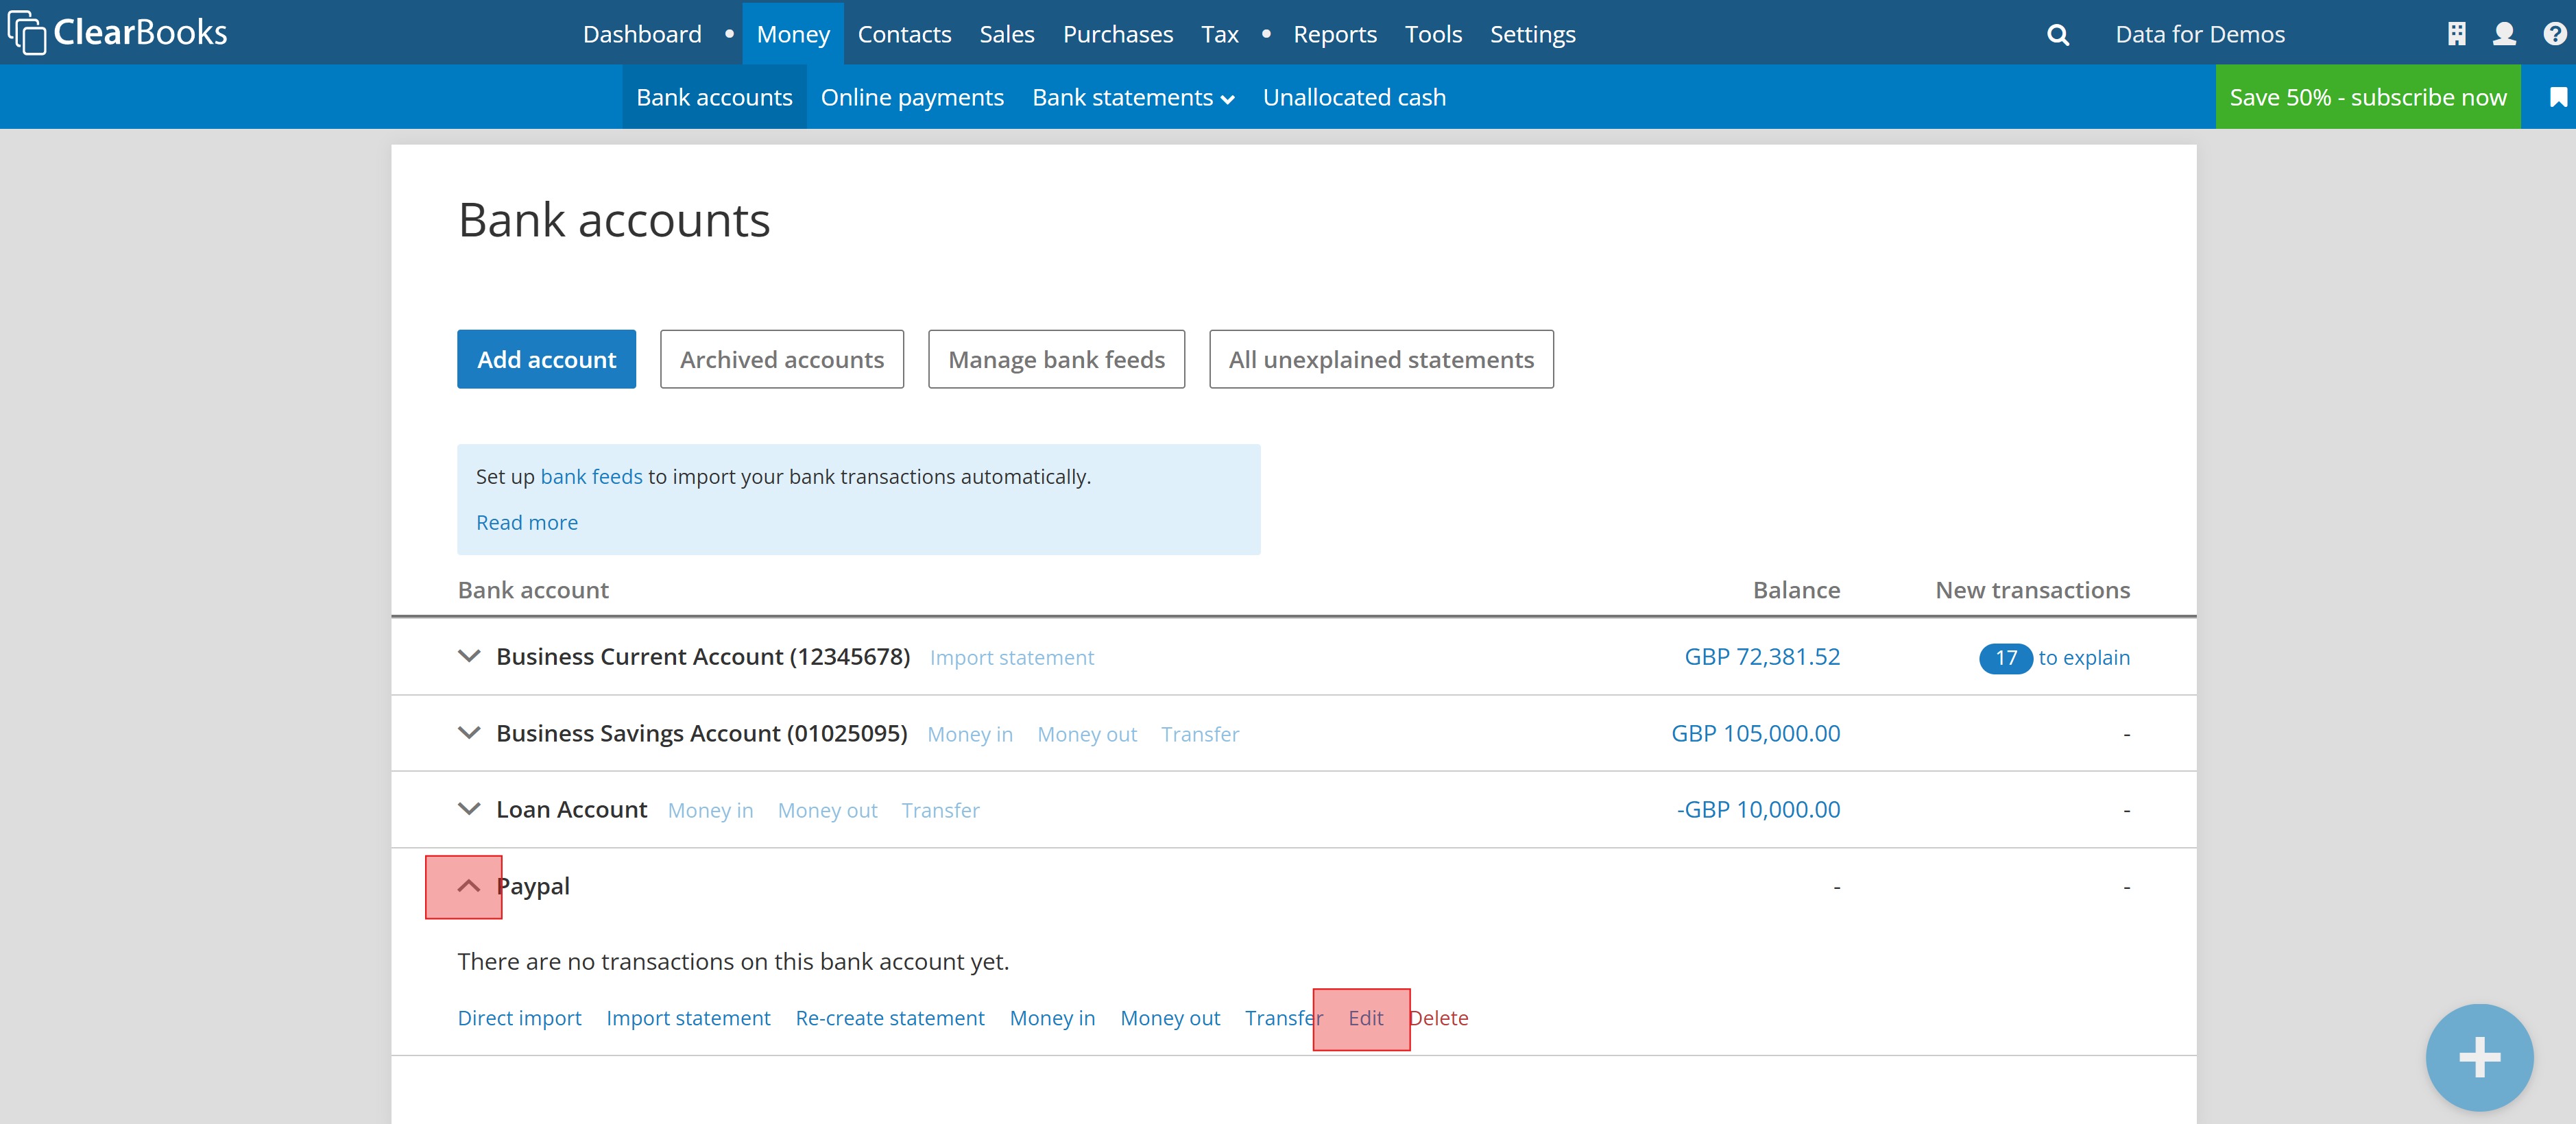
2.8 Enable Auto import: Enable the "Automatic Import" setting if you would like statements to be automatically imported.
Please note: Contacts are not created in this automation. To trigger automatic imports, there must be at least a single statement transaction imported / or at least 1 transaction manually.
IMPORTANT the email account must be set to the email address of the PayPal account you intend to import from. Once this has been done hit the Save button. You will then be sent a verification request email which you must verify before you begin importing.
If you deal in multiple currencies within PayPal and would like to show the balance of each currency in Clear Books, you will need to create a PayPal account for each currency.
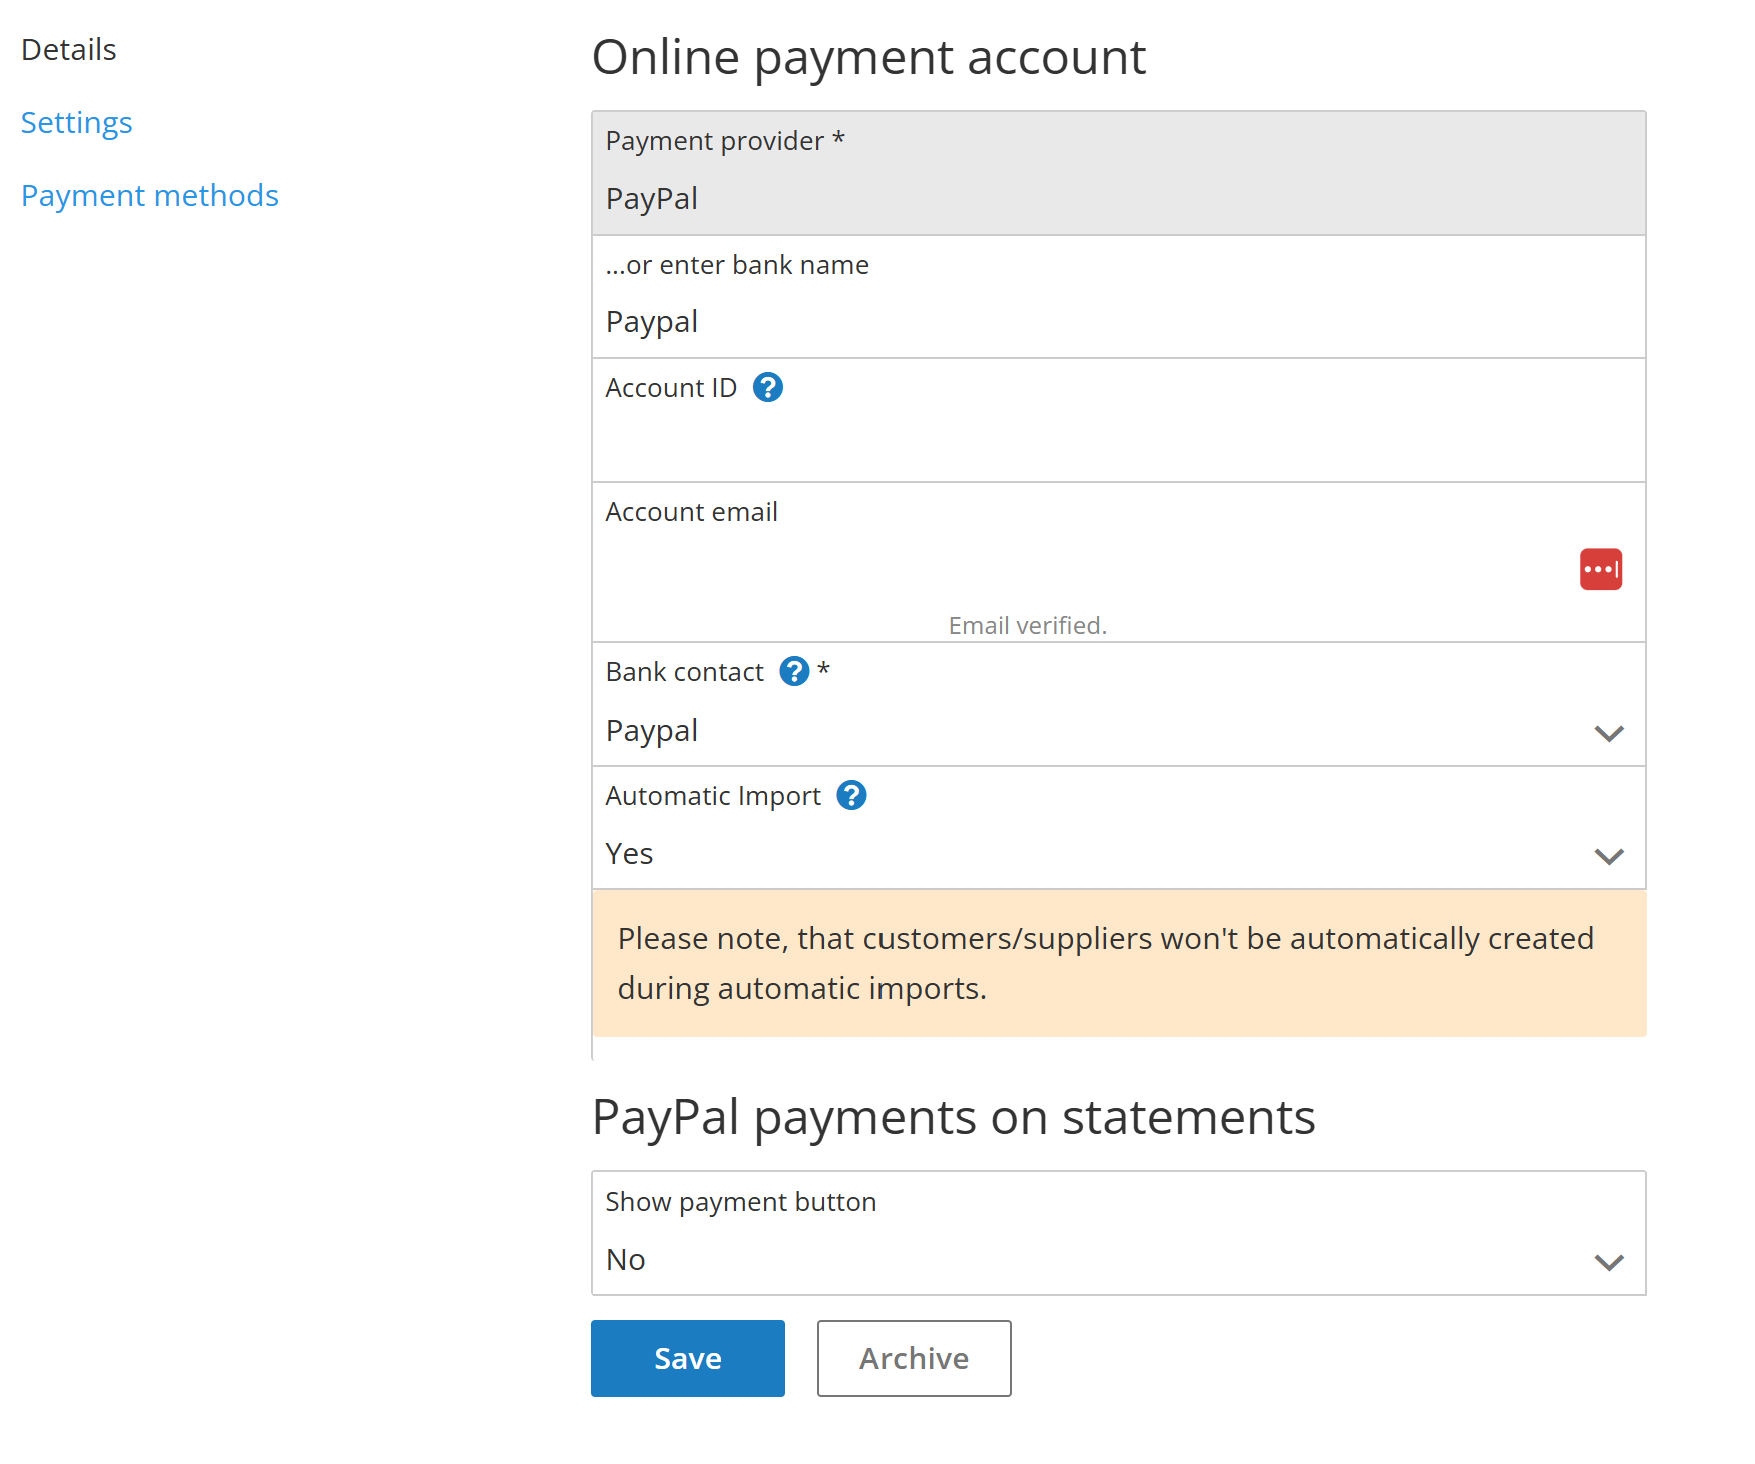
2.9 Set multi currency conversion: If you would like Clear Books to convert all multi currency transactions into the currency of the Paypal account, click on the Settings link and tick the Currency Conversion Handling check box.
Please note: Due to a limitation of the PayPal API, this tool cannot match the original description for transactions involving currency conversion within your PayPal account. For example, if you have a GBP PayPal account and make a payment in USD, the PayPal transaction description will appear as "Conversion from USD to GBP" instead of the original description, such as "Purchase of xyz."

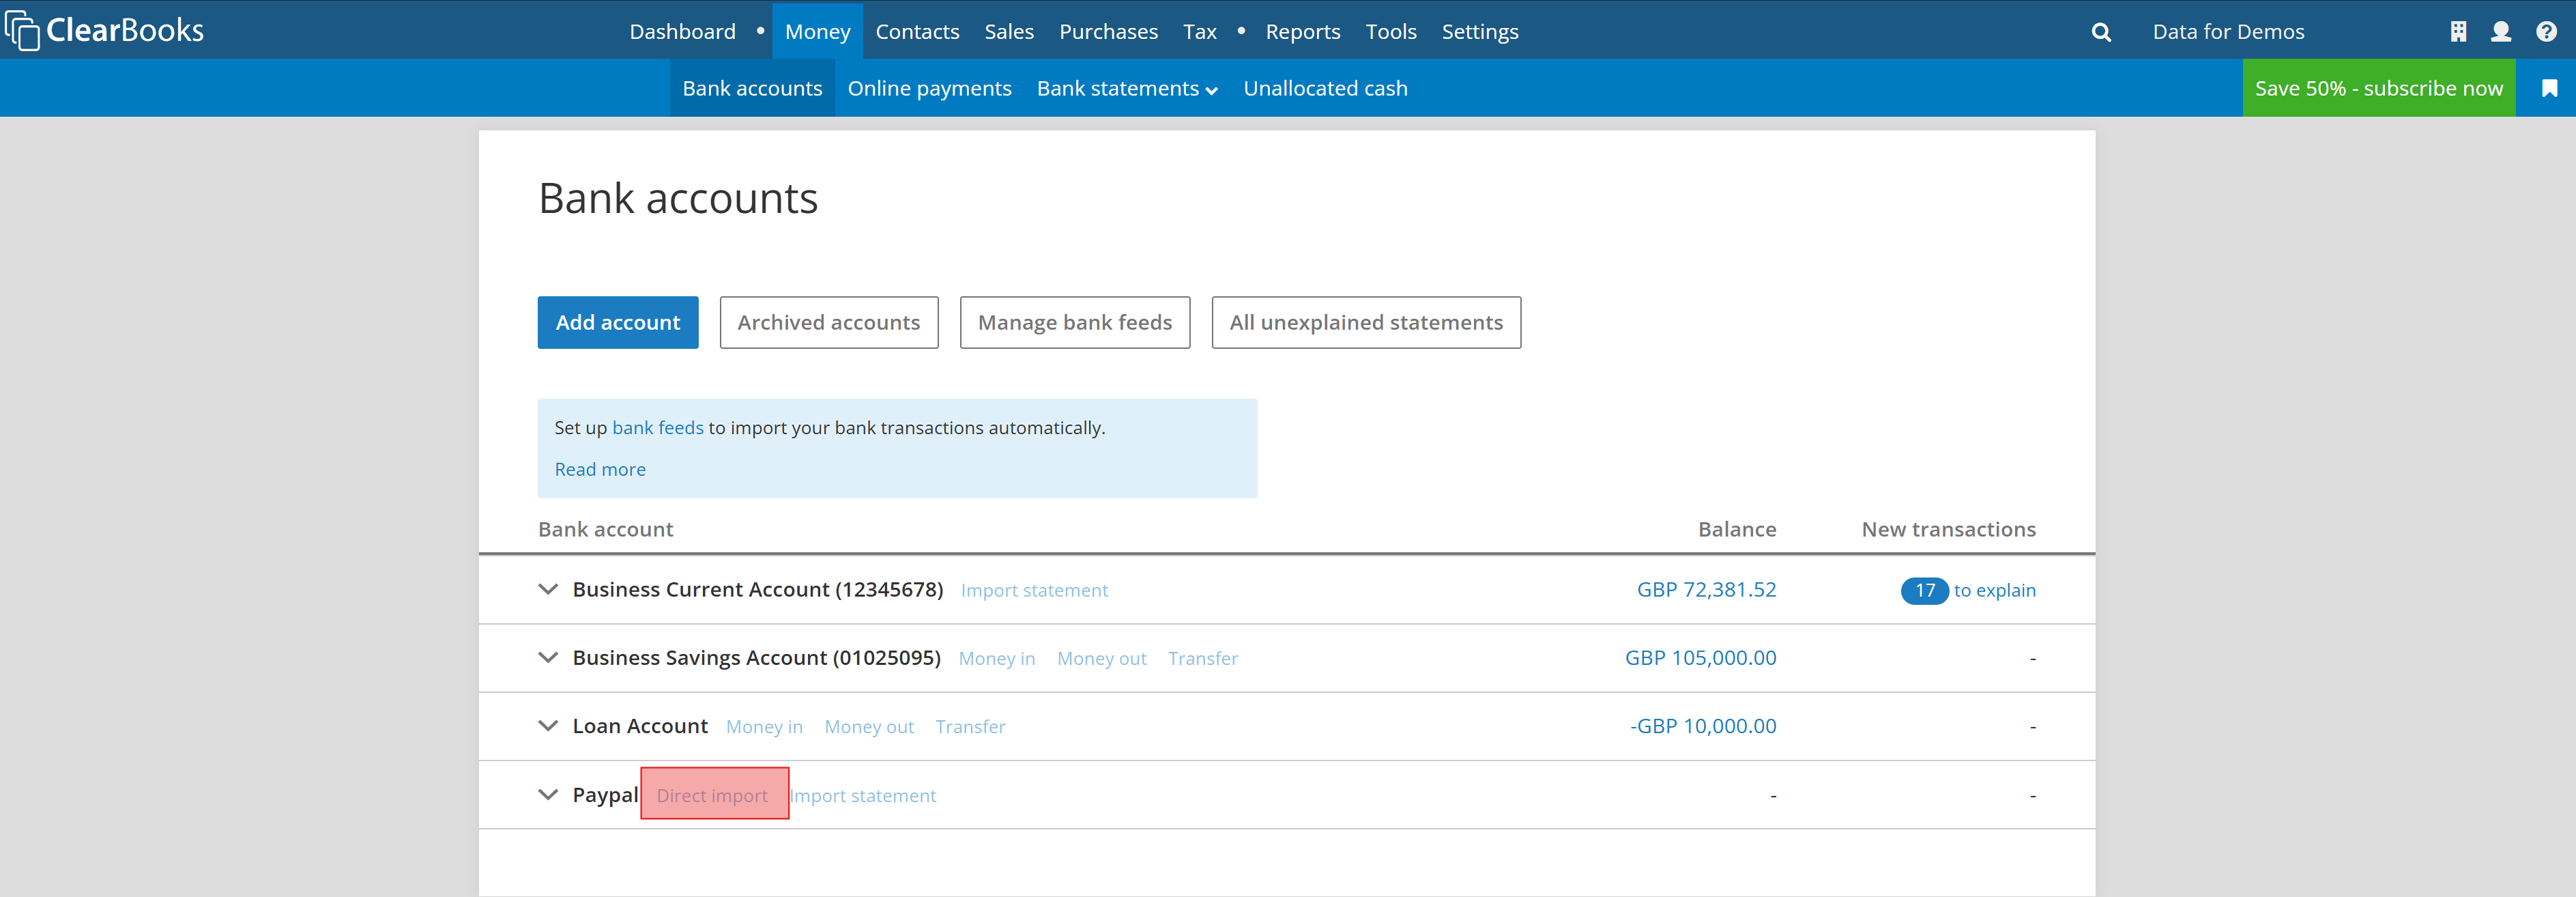
2.10 Perform direct import: Navigate to Money > Bank accounts and click the Direct import link for your PayPal account.
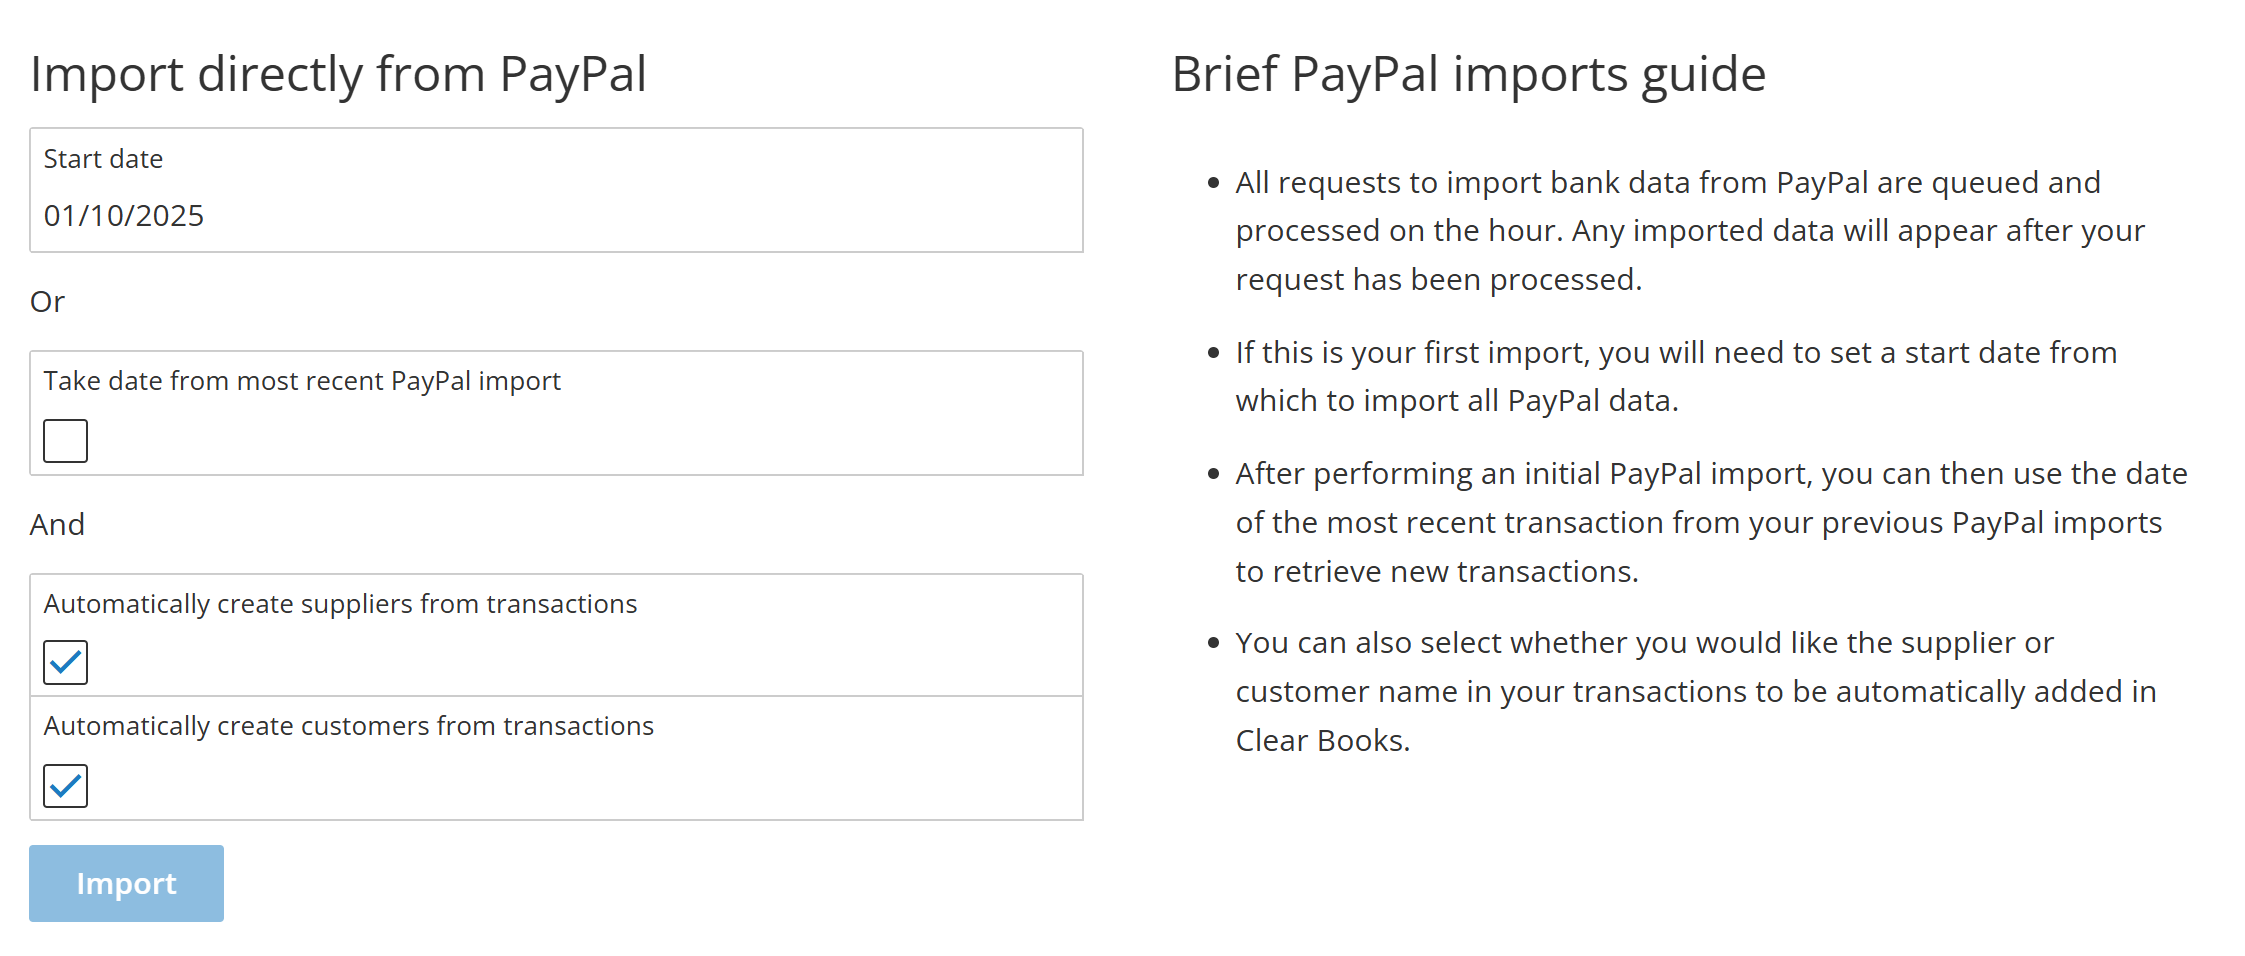
If this is the initial import then a start date for the import must be set. Choose whether to create suppliers/customers automatically for each transaction. When ready, click the Import button.
All statements should be imported on the next hour and will appear on the Money > Bank accounts menu under the table Imported statements that need explaining.
Any PayPal transaction fees will link to the appropriate transaction and be automatically explained with the account code bank charges.
3. Add a PayPal 'Pay Now' button to statements
PayPal can be used to collect payments from customers. A PayPal account must be set up on your Clear Books business first before these steps can be completed.
3.1 Edit bank account details: Navigate Money > Bank accounts and click on the "Edit" link next to your PayPal account. You may need to click on the down arrow beside your PayPal account to view the full list of options.
3.2 Enable show payment button: Make sure to select Yes in the Show payment button drop-down box and hit the Save button.

The PayPal button will now appear beside all unpaid invoices on the full statement link. This link is sent within all invoices and customer statements by default.
To preview how the PayPal button appears on the statement link, head to Contacts > Customers and click on the amount currently due for any customer with an outstanding balance:
Click on the Full (this view) link to view the statement sent to your customer in emails.
Was this article helpful?
That’s Great!
Thank you for your feedback
Sorry! We couldn't be helpful
Thank you for your feedback
Feedback sent
We appreciate your effort and will try to fix the article