The help guide series for our Full Accounting productSet up and manage your end-to-end time tracking workflow, from enabling the core features to generating client invoices based on billable hours.
1. Enable Time Tracking
You must enable both the Projects and Time Tracking features before you can log any time.
1.2 Enable the features
Toggle on the Projects feature first, followed by the Time Tracking feature using the slide buttons beside them.

2. Manage Tasks
Tasks determine how much each time sheet is billed. You must set them up before logging time.
Add a New Task
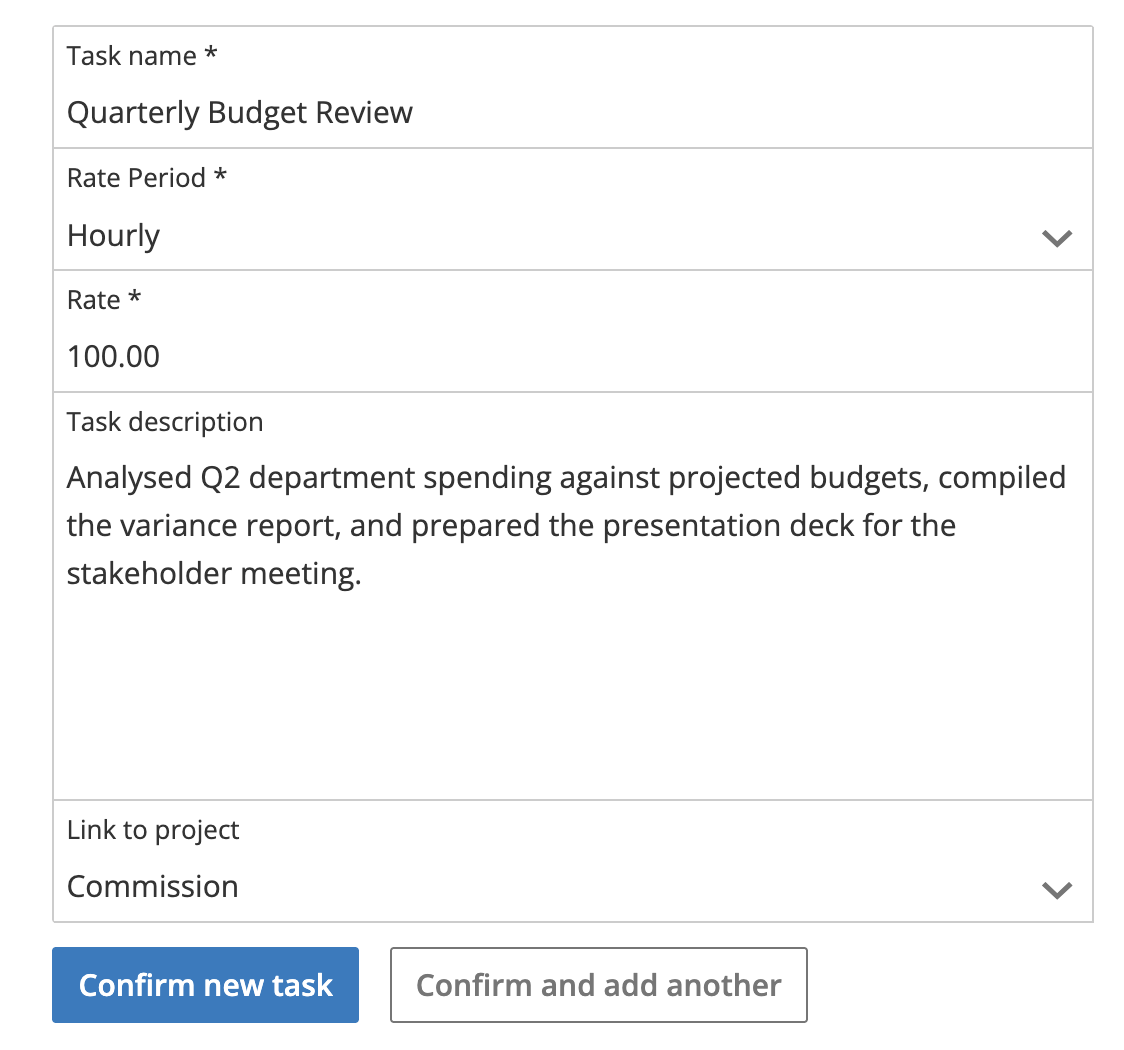
- Open task creation: Navigate to Tools > Projects > Tasks (click on Create task if you already have one).
- Complete details: Fill in the required fields to define the task and hit Confirm new task.
Edit or Delete Tasks
- To Edit: Navigate to Tools > Projects > Tasks, click on the task name you want to update, change the details, and click Confirm Changes.
- To Delete: On the Tasks page, tick the boxes beside the tasks you want to remove (or tick the column header to select all), then click Delete Selected.
3. Log Time Sheets
Once your tasks and projects are ready, you can log time individually or on a weekly basis.
Single Time Sheets
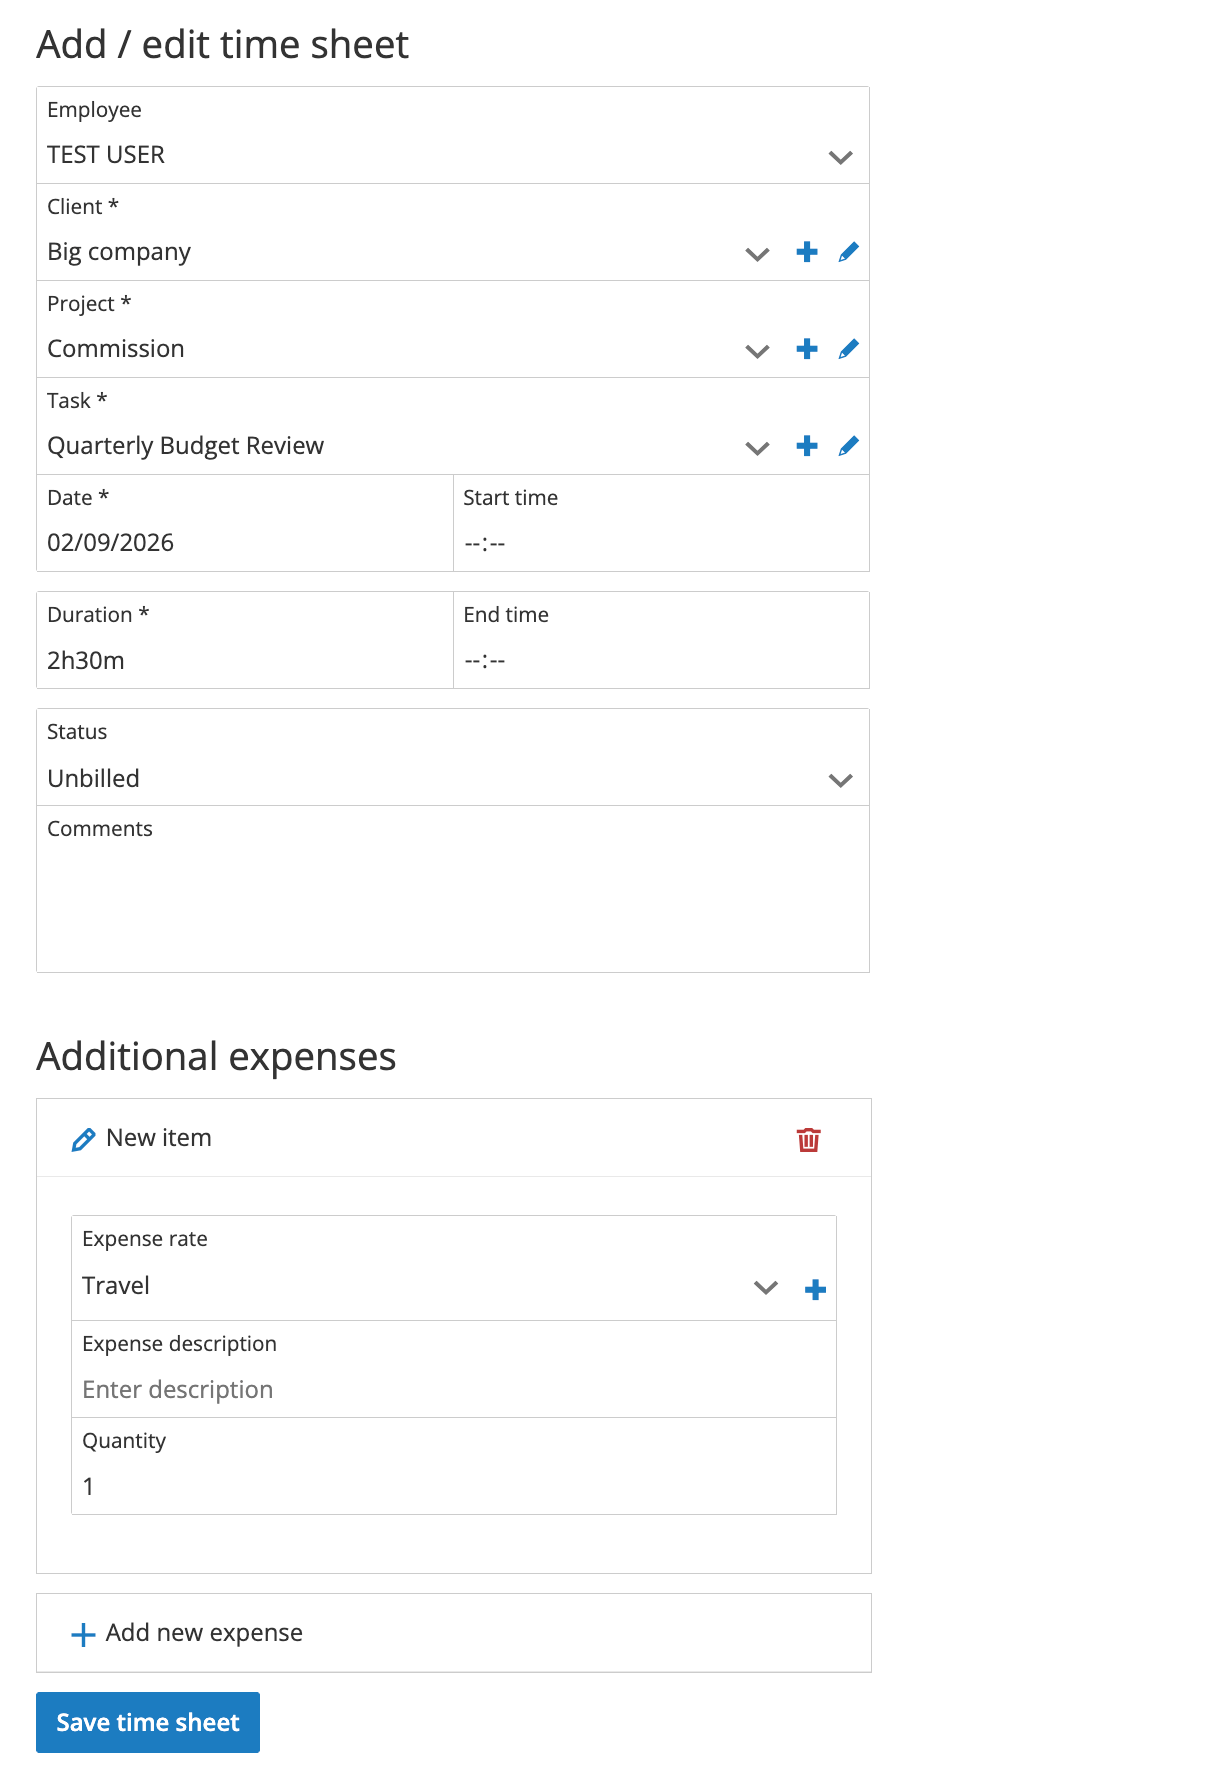
- Open the creator: Navigate to Tools > Time tracking > Time sheets and click on the Create time sheet button.
- Enter details: Fill in the required fields marked with a red asterisk. You can add new clients, projects, and tasks on an ad-hoc basis by clicking the + button next to each drop-down box.
- Set billing status: Mark the time sheet as Billed or Unbilled. (Leave it Unbilled if you plan to convert it into an invoice later).
- Save: Click Save time sheet.
Weekly Time Sheets
4. Generate an Invoice from Time Sheets
Once you have logged Unbilled time sheets, you can convert them directly into a draft invoice for your client.
Was this article helpful?
That’s Great!
Thank you for your feedback
Sorry! We couldn't be helpful
Thank you for your feedback
Feedback sent
We appreciate your effort and will try to fix the article